
Protein Peanut Butter Cups (9g Protein, No Bake)
Homemade protein peanut butter cups made with peanut butter powder and protein powder instead of straight peanut butter, at 9g of protein and 186 calories each.

I make a tray of these on Sunday and hide them behind the frozen peas.
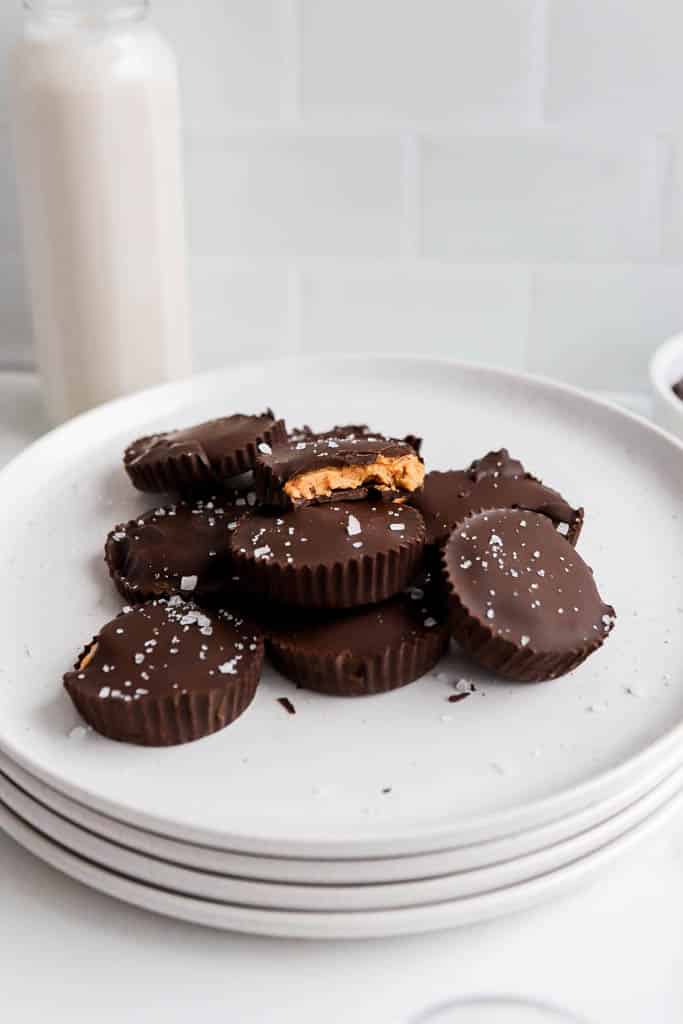
Protein peanut butter cups are homemade Reese’s, with a filling of peanut butter powder and protein powder mixed with water instead of straight peanut butter, set between two layers of dark chocolate. This batch makes 9 at 186 calories and 9g of protein each, and they set in 15 minutes in the freezer.
The peanut butter powder is the whole trick and it’s what separates these from every other version. Straight peanut butter is mostly fat, so a cup made with it lands around 250 calories with single-digit protein. Swapping to powder plus protein powder flips that ratio without losing the flavor.

What You Need
Amounts are in the recipe card.
PB Fit or another peanut butter powder. Peanuts with most of the oil pressed out, so you get peanut flavor without the fat. Rehydrated with water it makes a dough rather than a paste, which is what lets the filling hold its shape between the chocolate layers instead of oozing.
Protein powder. I use PEScience Peanut Butter Cookie. Vanilla or chocolate work fine. This is doing double duty, adding the protein and also thickening the filling, so a swap changes the texture as much as the flavor.
Water. A quarter cup, and add it slowly. Peanut butter powder goes from crumbly to soupy in about a tablespoon, so it’s easier to add more than to fix too much.
Dark chocolate. 140g. Dark rather than milk because the filling is already sweet from the protein powder. Chips, a bar chopped up, or wafers all work.
Coconut oil. One teaspoon, stirred into the melting chocolate. It thins the chocolate so the layers pour thin and even, and it helps them snap when you bite rather than bend. The tradeoff worth knowing about with any no bake chocolate recipe is that coconut oil lowers the melting point, so these soften on the counter faster than a plain chocolate bar would. That’s the reason they live in the fridge rather than a candy dish.
How to Make Them
- Mix the filling. Peanut butter powder, protein powder, and water until it forms a dough you can roll between your fingers.
- Melt the chocolate with the coconut oil, in 30 second bursts, stirring between each. Stop while a few pieces are still solid and stir them out with the residual heat.
- Line a muffin tin with paper liners and spoon about a teaspoon of chocolate into each.
- Flatten a scoop of filling into a disc slightly smaller than the liner and press it onto the chocolate.
- Pour more chocolate over the top, enough to seal the edges so no filling shows.
- Freeze 15 minutes to set, then peel off the liners.
Why Peanut Butter Powder Instead of Peanut Butter
This is the decision that defines the recipe, and it’s worth understanding before you swap it out.
Regular peanut butter is roughly 50% fat. In a peanut butter cup, that fat is what makes the filling soft and greasy and what pushes the calories up while the protein stays low. Most protein peanut butter cup recipes use real peanut butter and end up between 114 and 268 calories a cup, with the higher-calorie ones not delivering proportionally more protein.
Peanut butter powder is peanuts with the oil pressed out. You keep the flavor, lose most of the fat, and what’s left is largely protein and fiber. Rehydrated with water it becomes a stiff dough, and that stiffness is a practical advantage as well as a nutritional one, because the filling holds a clean disc shape instead of spreading into the chocolate.
The tradeoff is texture. These are not as melty as a Reese’s. The filling is denser and more fudge-like, closer to a cookie dough than a smooth paste. Some people prefer it and some miss the ooze, so it’s worth knowing before you make a whole tray.
If you want the middle ground, swap a tablespoon of the water for real peanut butter. You get some of the softness back and the protein barely moves.

Tips
Add the water in stages. Peanut butter powder absorbs unevenly, and a filling that’s slightly too dry is fixable while one that’s too wet means starting over or adding more powder and throwing off the ratios.
- Tap the tin on the counter after the bottom chocolate layer goes in. It levels out and you avoid a thin spot that cracks when you peel the liner.
- Chill between layers if you have time. Ten minutes after the base sets gives you a clean line instead of the filling sinking through.
- Seal the edges properly. Pour the top layer so it runs down the sides. Exposed filling dries out in the fridge.
- Flaky sea salt on top before they set. It’s the one addition that changes these from good to worth hiding behind the peas.
If your chocolate turns thick and grainy in the bowl, it seized, and the cause is almost always a drop of water getting in or the microwave running too long. Melted chocolate goes from glossy to ruined in about ten seconds of extra heat, which is why the short bursts matter more than they sound like they do. A seized batch won’t pour and you can’t stir it smooth again, so dry everything before you start and pull the bowl while a few pieces are still solid.
Variations
- Swap the nut butter powder. Almond or cashew butter powder work the same way.
- Nut free. Sunflower seed butter powder, and check your protein powder.
- Dairy free. Dairy free chocolate and a plant protein. Plant proteins absorb more water, so expect to add a splash extra.

Storing and Freezing
Fridge: Airtight container for up to a week. These live in the fridge because the coconut oil in the chocolate softens at room temperature.
Freezer: Up to 3 months, layered with parchment. Straight from the freezer they’re firm and snappy, which is how I eat them.
Thawing: A few minutes on the counter is enough. Don’t leave them out longer than that or the chocolate goes soft and the liner sticks.

Protein Peanut Butter Cups
Ingredients
- 1 scoop PEScience Peanut Butter Cookie protein powder
- ⅓ cup PB Fit
- ¼ cup water may need more depending on your protein powder
- 140 g dark chocolate
- 1 tsp coconut oil
Instructions
- In a mixing bowl, combine the PB Fit, protein powder, and water. Mix well until a dough-like consistency is achieved.
- In a separate bowl, melt chocolate and coconut oil in the microwave or on the stovetop in a small saucepan. Stir well until a smooth mixture is achieved.
- Line a muffin tin with paper muffin liners. Add a thin layer of chocolate to the bottom of the cupcake liners (approx 1 teaspoon).
- Scoop the peanut butter filling into each muffin cup, then pour more of the melted chocolate mixture on top of the peanut butter layer.
- Repeat until all muffin cups are filled.
- Place the peanut butter protein cups in the freezer for at least 15 minutes to set.
- Remove the paper liners from the protein peanut butter cups and store them in an airtight container in the refrigerator or freezer.
Nutrition
The nutrition information provided is calculated based on industry-standard software and should be used as a general guide only. The information may vary depending on ingredient substitutions, cooking techniques, and individual serving sizes. It is the responsibility of the reader to ensure the accuracy and appropriateness of the nutritional information provided. Always consult a qualified healthcare provider for personalized medical or nutritional advice.
More Chocolate Recipes to Try
- Homemade Twix Bars
- Homemade Nestle Crunch Bars
- Protein Chocolate Covered Cookie Dough Bites
- Chocolate Peanut Butter Protein Ice Cream
- 2-Ingredient Chocolate Protein Pudding
If you make these, leave a star rating and tell me which protein powder you used, because that’s the variable that changes the filling most. Tag me @basicswithbails or save this for the next time a Reese’s craving hits.

About Bailey
I love to bake, cook, exercise, and document all of the above. Nutrition is not low fat. It is not low calorie. It’s not feeling deprived or being hungry all the time. It’s nourishing your body with real, whole foods so that you are consistently satisfied and energized to live your life to the fullest! Read more…


